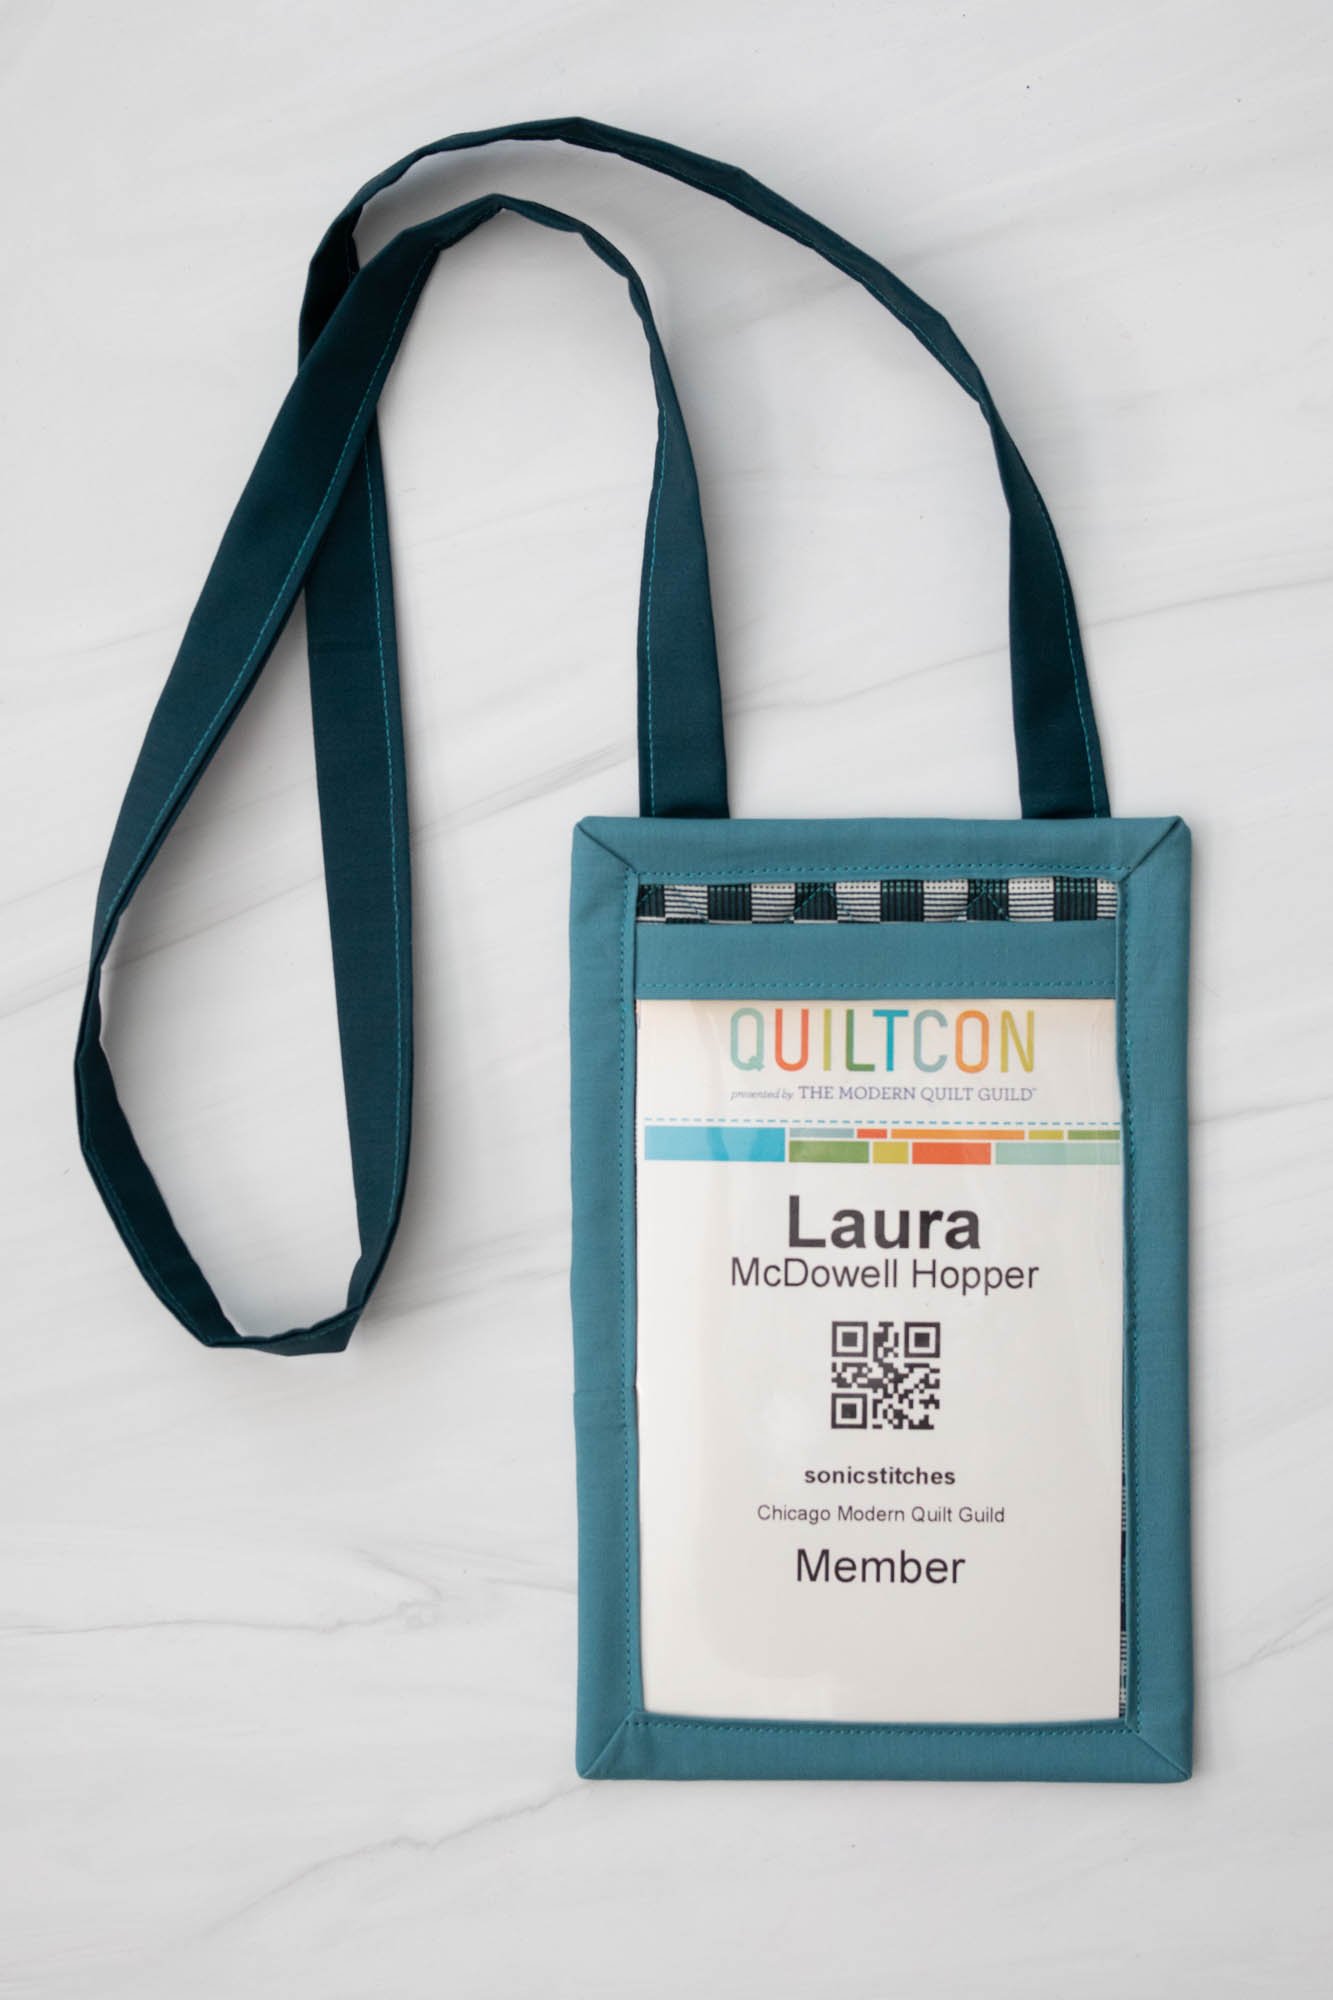
QuiltCon Name Tag Holder
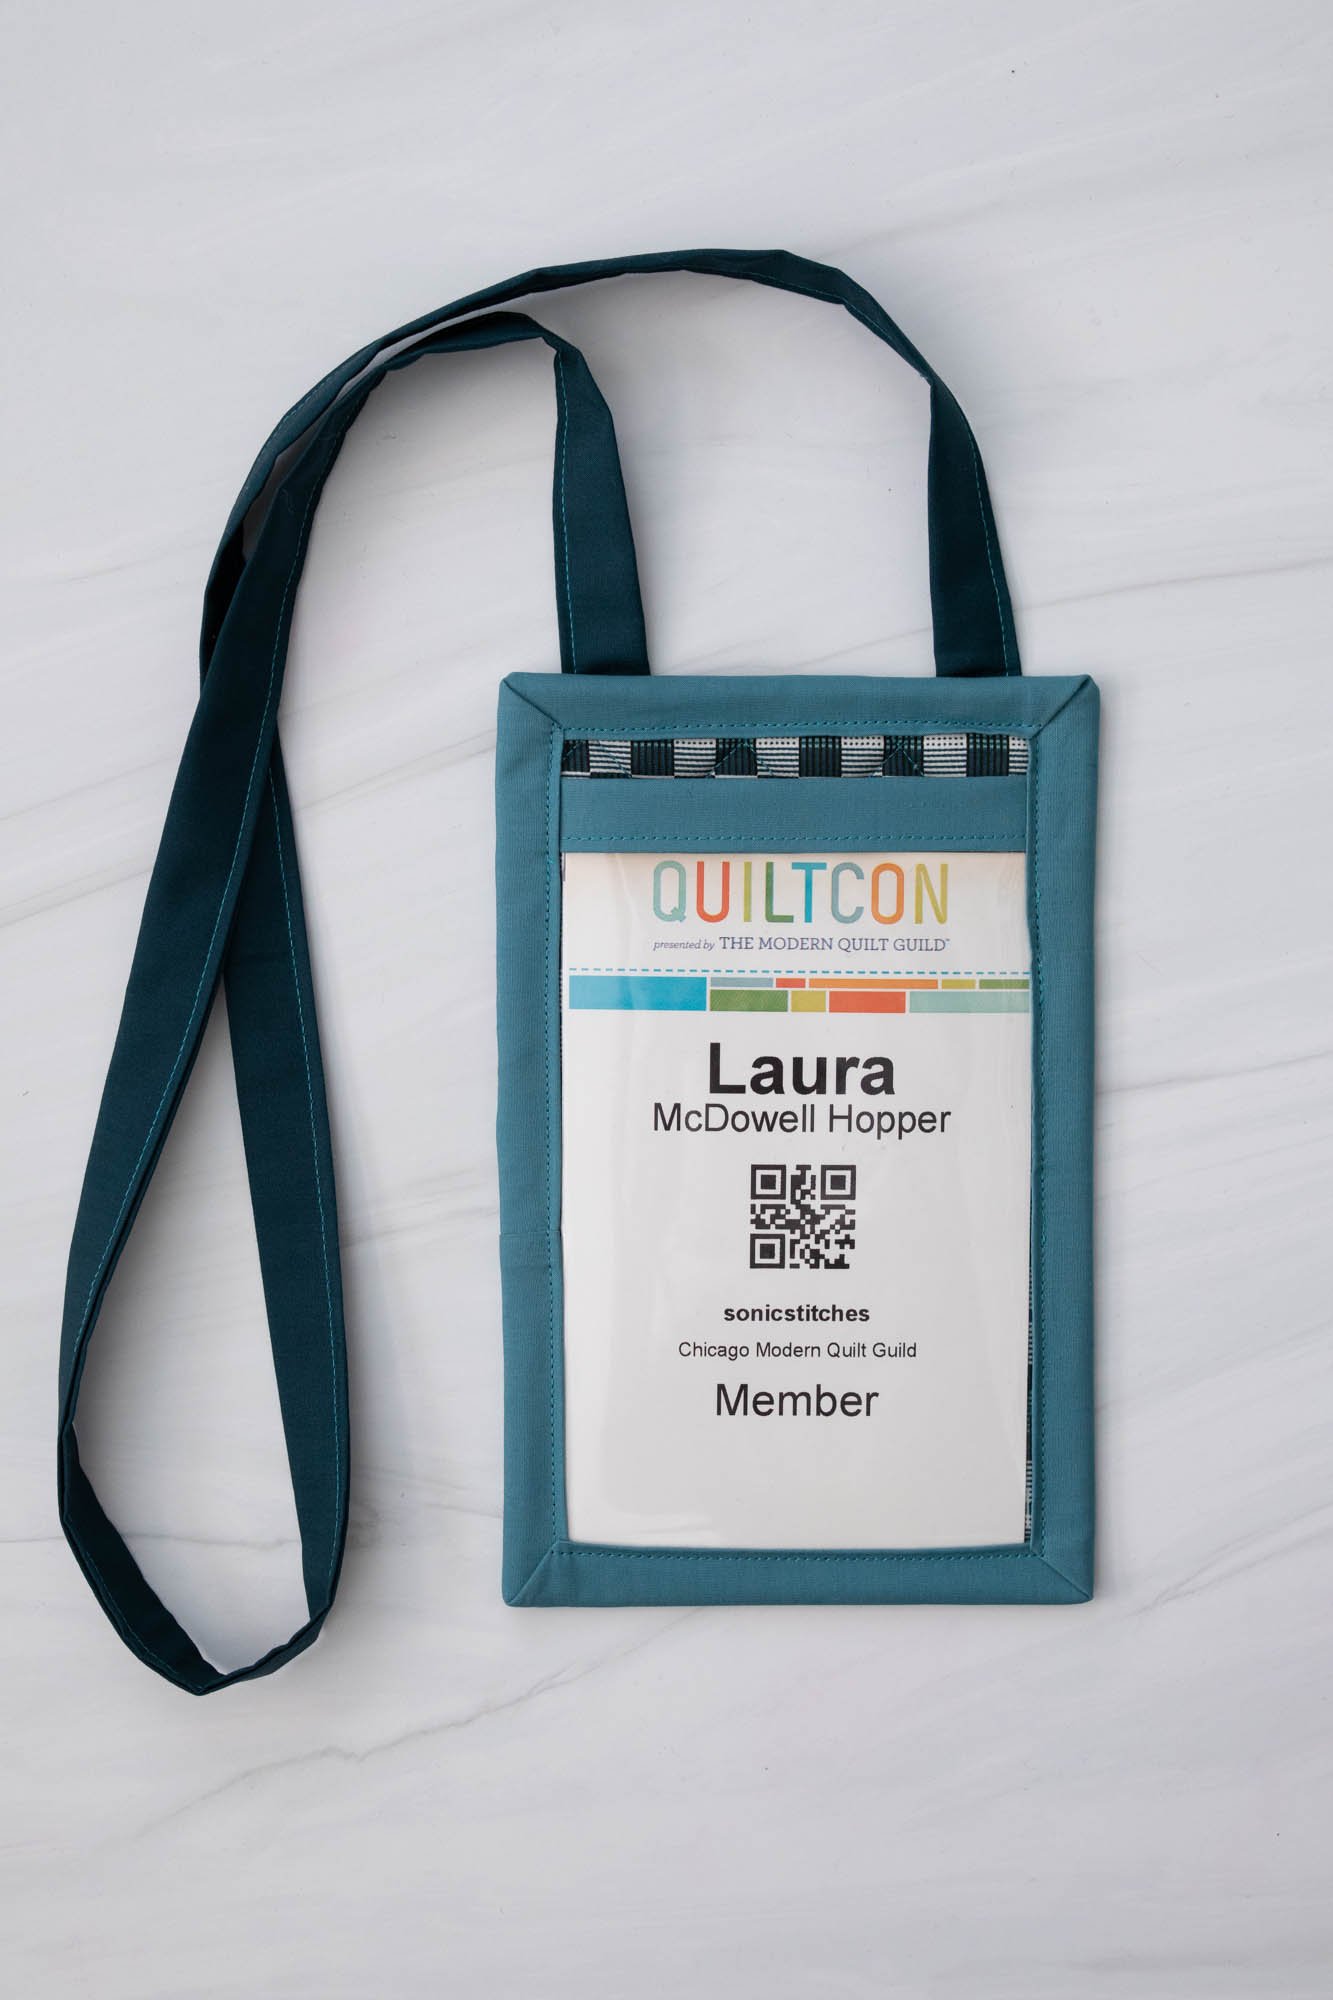
Are you going to QuiltCon 2024? I am! I noticed that last year, name tags did not come with plastic holders. No problem! I can make something myself that can be reused and shows off a bit of my style while I’m at it. A very good friend asked me to type up the instructions for how I made this…and then MANY more people asked how I made it in my Instagram DMs. So I’m sharing my tutorial for a limited time! When I get back from QuiltCon, I’ll take this down. So make yours now!
I just updated my website yesterday, and I typically view my website as a portfolio, not a blog. So this is a special gift for you last-minute QuiltCon crafters!
Before we get started, a couple of quick notes. One thing you’ll need that you might not necessarily have is clear vinyl. I get mine from Benzie Design, but you should be able to find this at a local craft store since you may not have time to get it shipped to you with this being a holiday weekend. Also, you’ll see some pictures that show D-Rings. Ignore that. It was an awful choice! I’ll talk about that more when I get to adding the neck strap :)
If you make a name tag holder, tag @sonicstitches on Instagram so I can see it!

Supplies
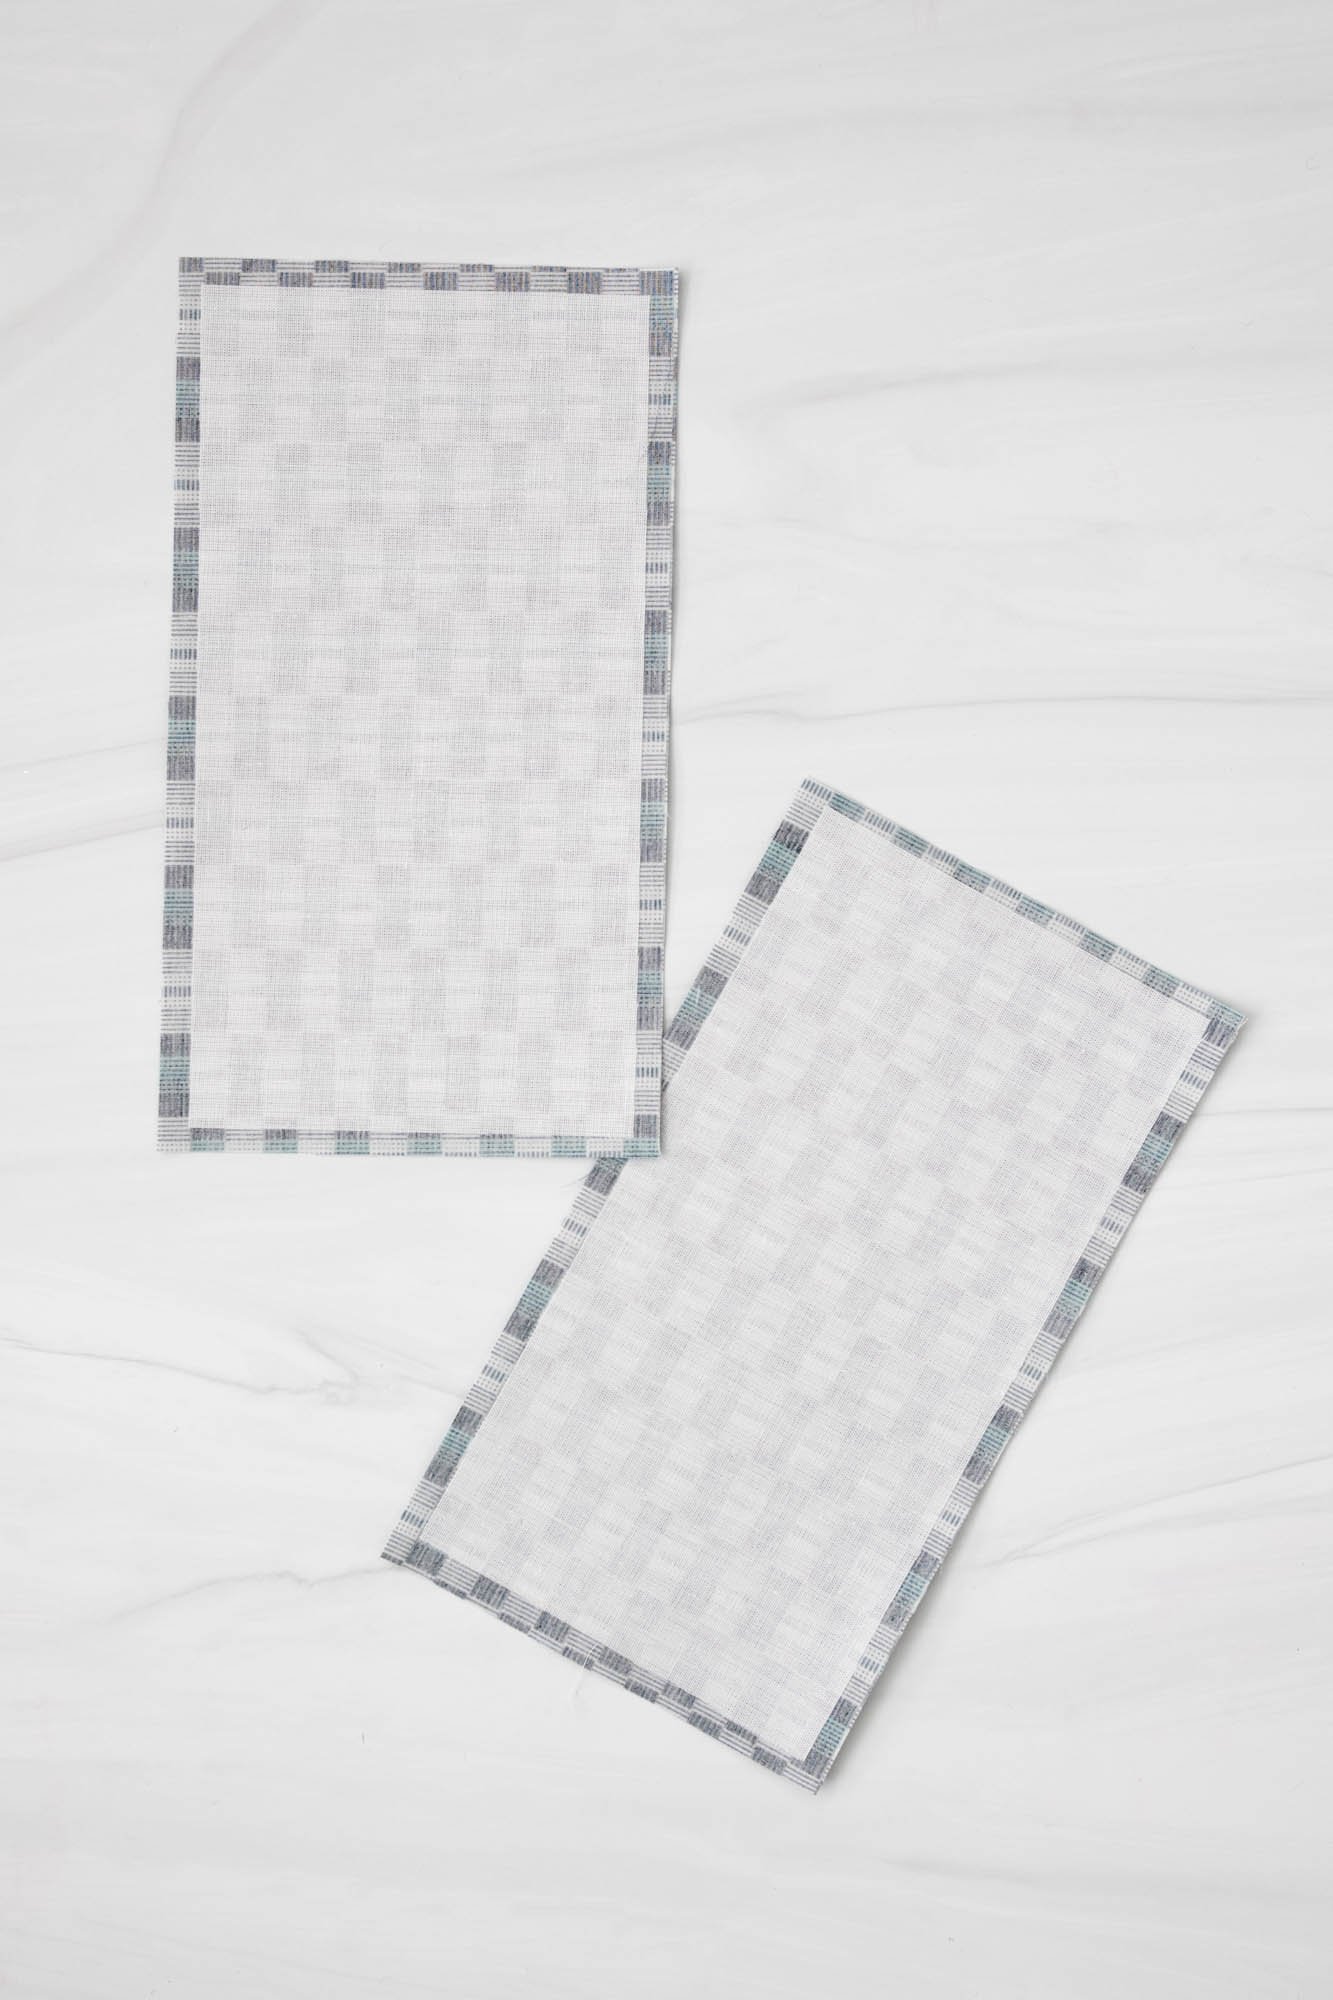
Front fabric: (1) 5" x 8"
Back fabric: (1) 5" x 8"
Fusible interfacing: (2) 4 1/2" x 7 1/2"
Soft and Stable: (1) 5" x 8" (If you do not have Soft and Stable, replace with fusible fleece or even some lofty wool or polyester batting. Soft and Stable makes the tag less floppy.)
Clear vinyl: (1) 5" x 7"
Vinyl top binding: (1) 2 1/2" x 5"
Binding: (1) 2 1/2" x 26 1/2" (NOTE: Depending on your seam allowance, cutting the binding this wide may result in a very snug holder for the name card. If you’re concerned, cut the binding to 2 1/4" x 26 1/2" instead.)
Neck strap: (1) 3" x width of fabric (WOF)
Thread
Binding clips
(Ignore the D-Rings in the picture above — I was originally going to write this in a Google Doc to share with one friend, so I was not able to rephotograph things!)
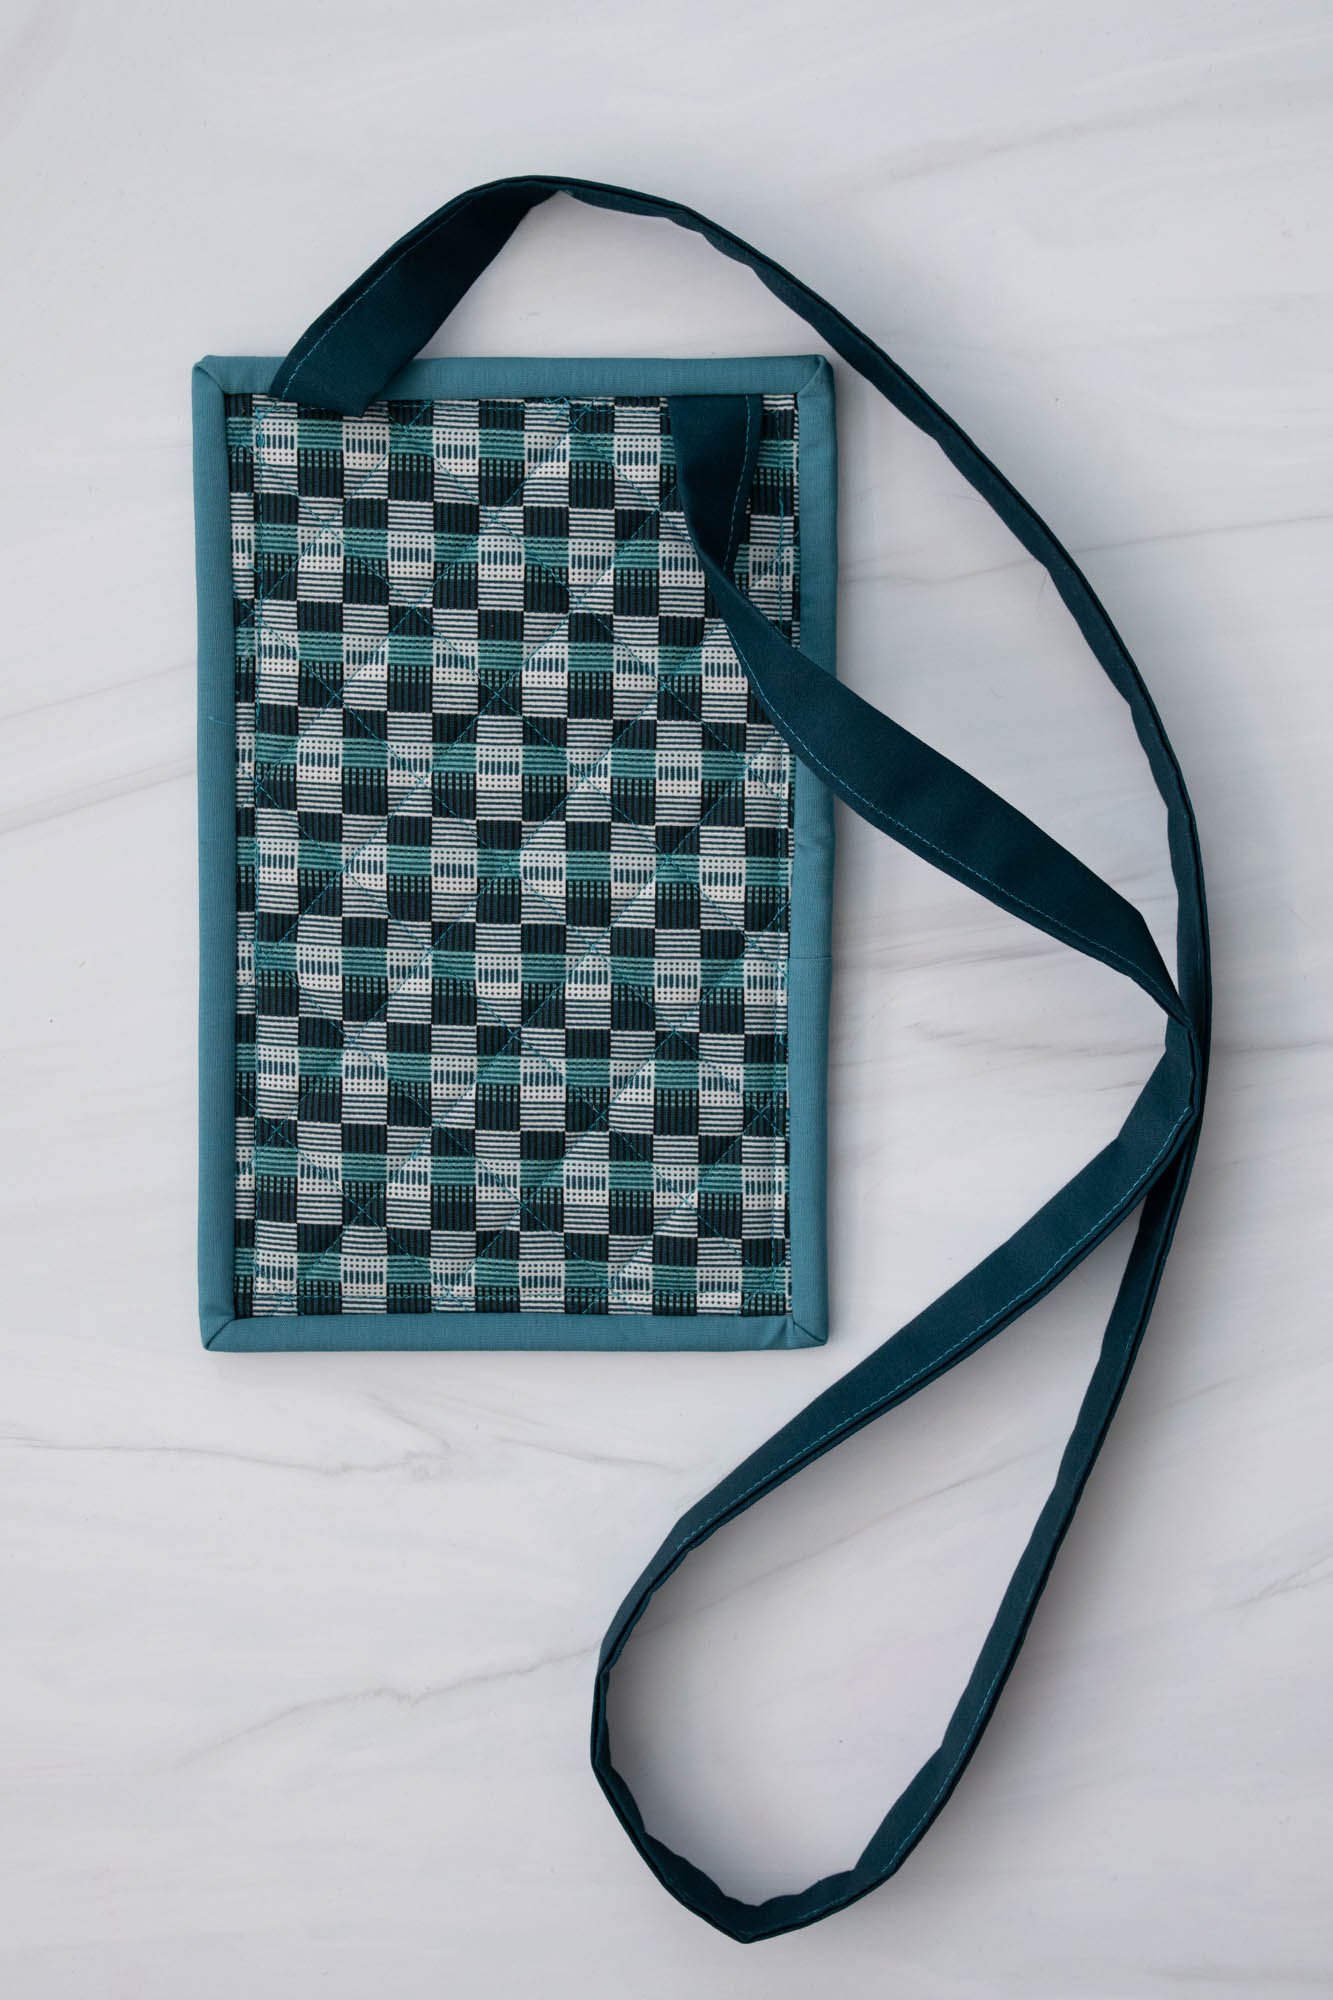
Step 1: Prepare Name Tag Holder Base
To prepare the name tag base, use the front fabric, back fabric, fusible interfacing pieces, and Soft and Stable.
Following manufacturer instructions, begin by ironing one piece of fusible interfacing to the wrong side of the front and back fabric pieces.
Layer the base pieces as follows: back fabric wrong side up, Soft and Stable, and front fabric right side up. Clip or pin around all sides.

Quilt as desired.

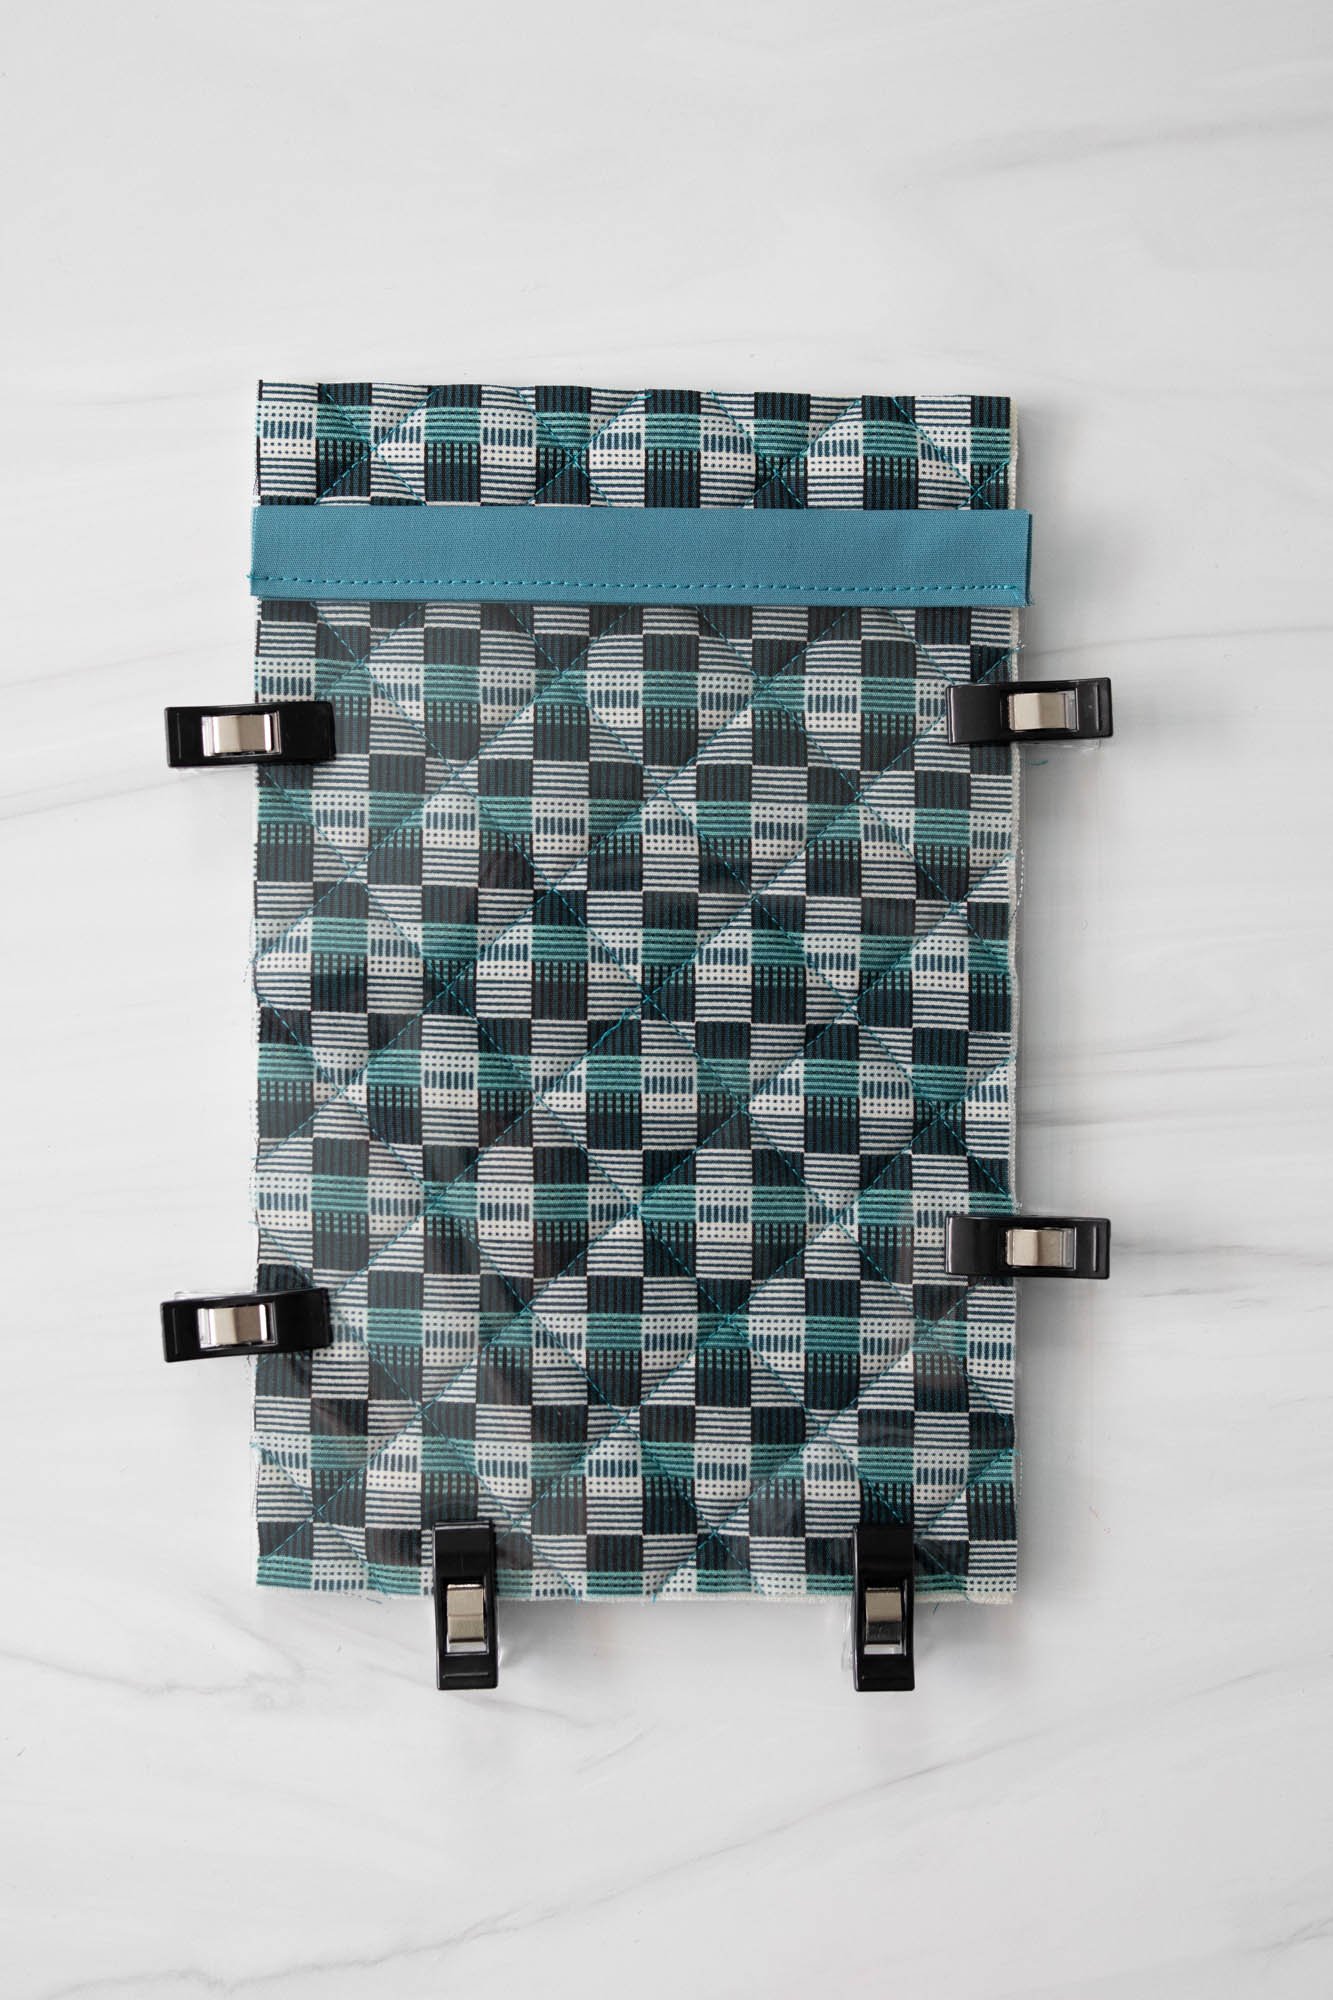
Step 2: Prepare the Vinyl
Make a small piece of fabric to sew to the top of the vinyl. To do this, fold both long sides to the center of the fabric and press. Fold the fabric in half along the long side (between the raw edges) and press.
Tuck the clear vinyl into the middle of the vinyl top binding piece and clip in place (note that using pins with vinyl will create small holes). Top stitch 1/8" from the bottom of the vinyl top binding.

Clip the vinyl piece to the front of the name tag base. Sew the vinyl to the base using a 1/8" seam allowance, backstitching at the beginning and end. Set aside.
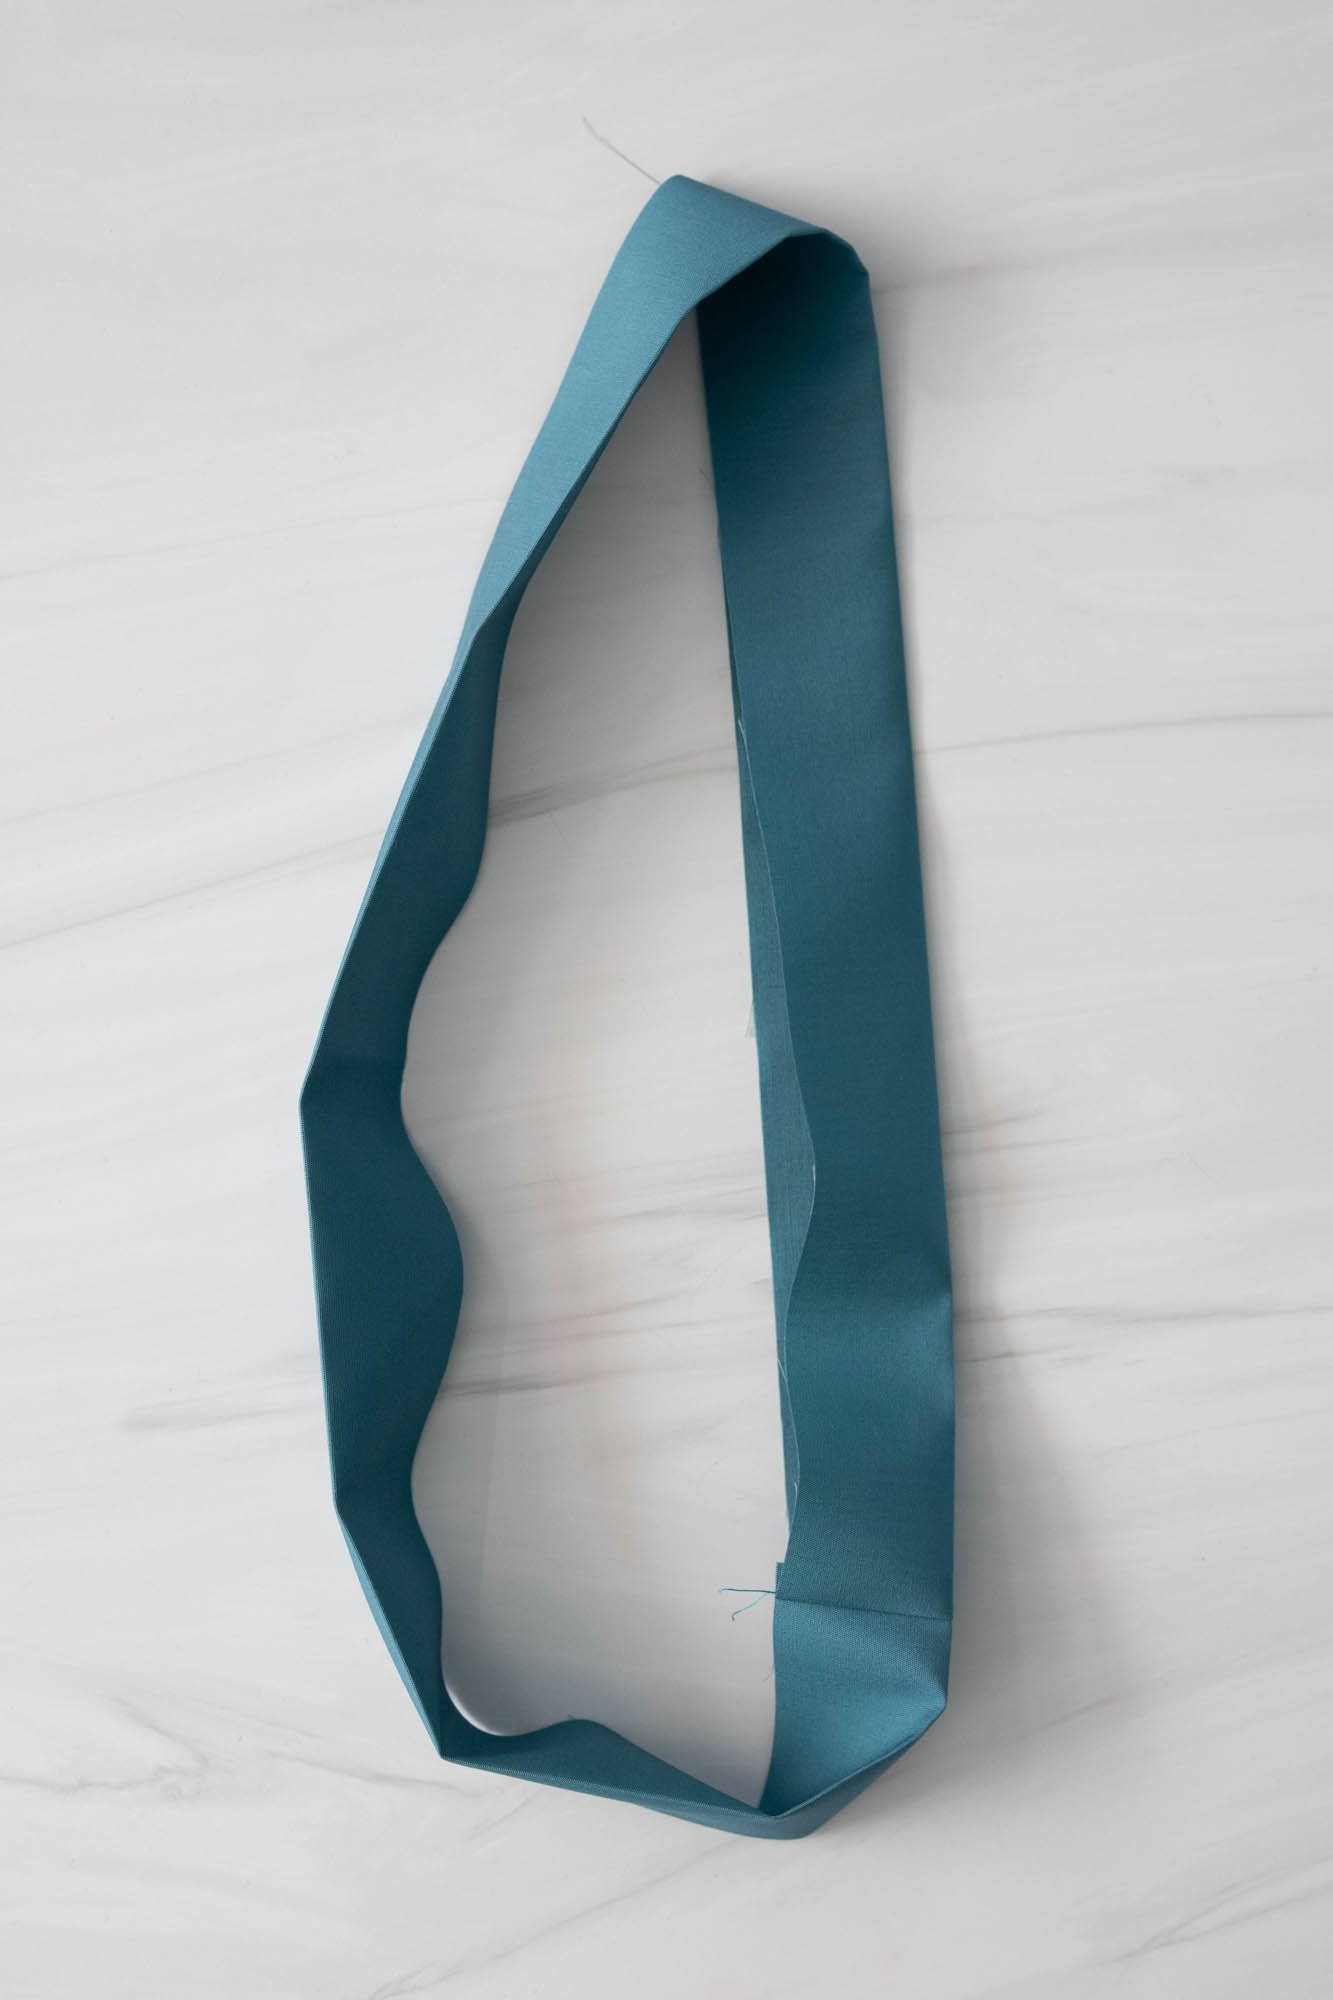
Step 3: Make the Neck Strap
Using the neck strap piece, make a long, thin strip by folding each long end towards the center of the fabric, then press. Next, fold the fabric in half down the center of the long sides, just like you did when making the vinyl top binding. Top stitch using a 1/8" seam allowance from the folded edge of the neck strap.

Step 4: Make Binding
Using the binding piece, fold the fabric in half along the long side and press. Do not make additional folds as you did in the previous steps — this is just like regular quilt binding.
Here’s where this differs from binding a regular quilt, so pay particular attention! Before attaching it to the name tag base, connect the short ends of the binding, right sides together, using a vertical 1/4" seam as shown below. Press the seam to one side. Be extra sure there are no twists in the binding.

Step 5: Finish the Name Tag Holder
Ok, let’s start by closing our eyes and picturing this — you have some really cool, shiny black D-Rings that you’ve never used. Hey! Lanyards have D-Rings on them! Maybe now’s the time. So you sew them to your name tag holder and realize…there’s no reason for this type of name tag holder to have D-Rings. They make too much noise and draw attention away from all the cool sewing. Hey, that’s exactly what happened to me!
At first, I thought it would be cool to add these. Then…I changed my mind. So in the end, I picked out the binding and replaced the D-rings with an all-fabric neck strap. I was originally planning to only share this tutorial with one friend who also wanted to make a name tag holder. So no big deal! I can still use the same pictures! (I literally planned to send it to my friend as a Google Doc.) Then LOTS of other people also asked for the tutorial ;) I’m only planning to keep this up for about a week, but if I ever formally publish this tutorial, I’ll retake the photos below.
So for the rest of this tutorial, any time you see a D-Ring, no matter how pretty it is, let’s agree to pretend that it’s just a regular neck strap that was made in Step 3. Time to resume the tutorial!
Clip the neck strap to the back of the name tag base, on the top, 1/2" in from each edge. Match up the raw edges of the name tag base and neck strap as shown below, and double-check to be sure that the neck strap is not twisted.
Right now, the neck strap will be about 42" since it is a WOF strip. This is a great time to test out the name tag holder. The binding clips will mimic the amount of the strap that will be under the binding. Try it on for size and cut the neck strap down to a length that you like.

Clip the binding to the BACK of the name tag base, with the neck strap still clipped between the binding and the name tag base. Begin sewing the binding on one of the long edges, using a 1/4" seam allowance. When you near the first corner, stop 1/4" before the end and sew off the corner diagonally as shown below.

Fold the binding to start the next side, and continue until the binding is completely attached.


Fold the binding to the FRONT of the name tag holder and clip into place. Machine stitch the front of the binding using a 1/8" seam allowance, mitering the corners. When sewing the binding to the top of the name tag holder, move the straps out of the way to avoid sewing over them.
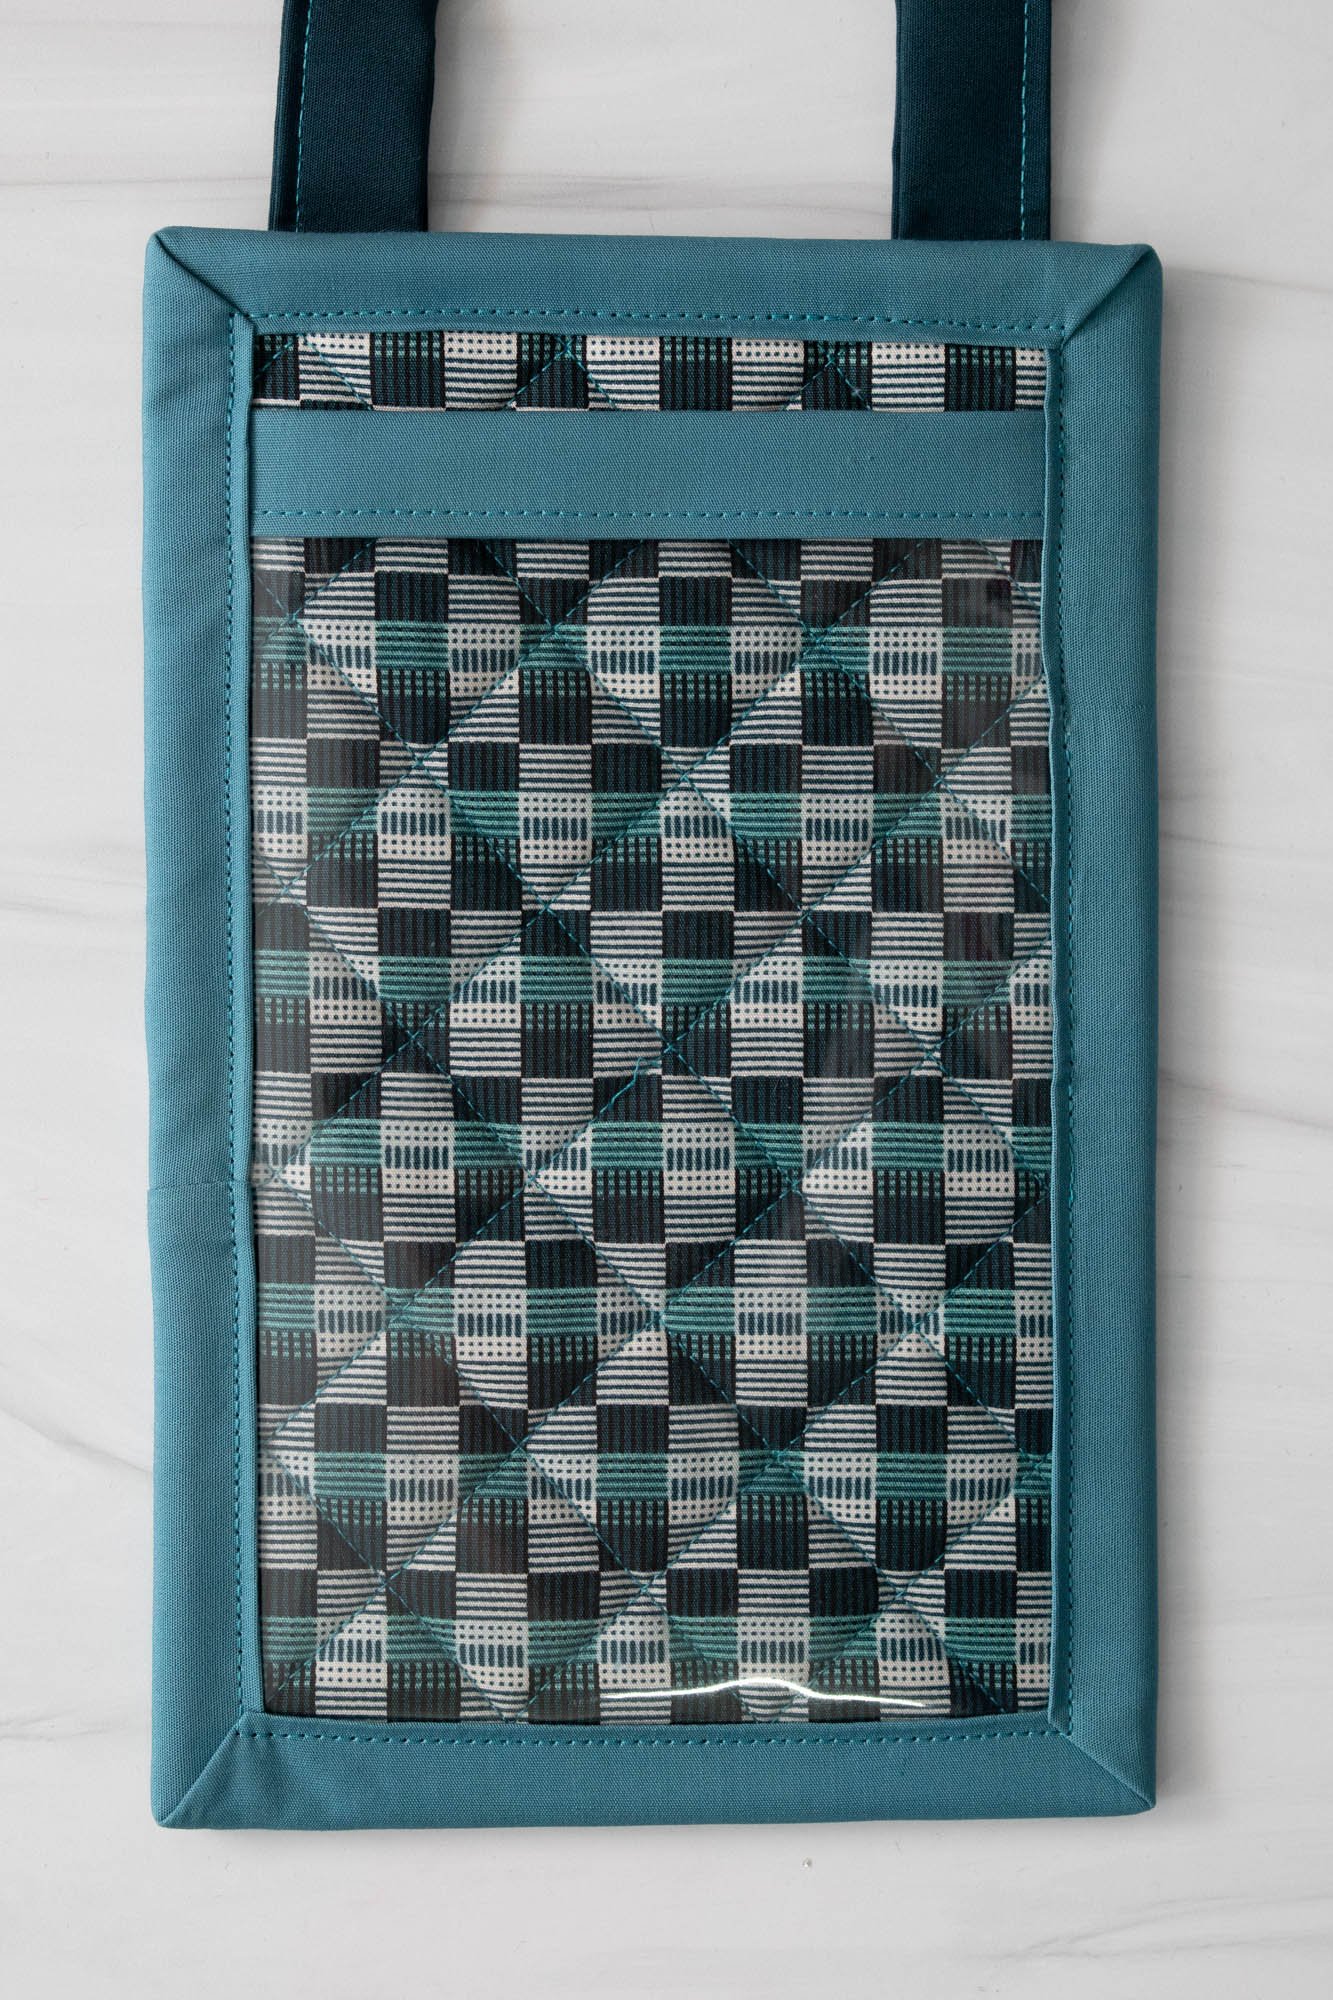
And your name tag holder is done! It would be so cool to see some of these at QuiltCon, so be sure to find my pretty blue name tag holder and say hi if you make one!